Category: How to guides

How to use our photo printing services
If you are happy to prepare your own files for print, then the Metroprint automated service could be for you. We also have a Deluxe service, so if you want one of our technicians to look over your files for colour adjustments, we can. With Metroprint you can produce black and white Lambda prints, Giclée Prints and C Types, plus order mounting and framing finishes, at lower online prices than those produced with technicians in lab at Metro Imaging. Use our handy ‘How To’ guides to get started.
Read More
How to make a photo print
Use our step-by-step guide for perfect prints Metroprint is a professional quality service that brings together our expertise in colour-management with your expertise in Photoshop. Although it is possible to upload any file, from phone camera, digital camera or scan, we would strongly advise that you follow the following steps to prepare your file from within Photoshop to ensure the best results every time: Cropping your image for print Sizing your image file in Photoshop Adding borders in Photoshop Saving your file for print If you don’t have Adobe Photoshop; or you would prefer to try the in-built tools on the website to do so? This is totally possible. But just incase you get stuck, we have prepared a few tutorials to help you out. Uploading your file Choosing your print media and size Adding borders Checking order settings, registering and choosing delivery options If you get stuck at any point, then […]
Read More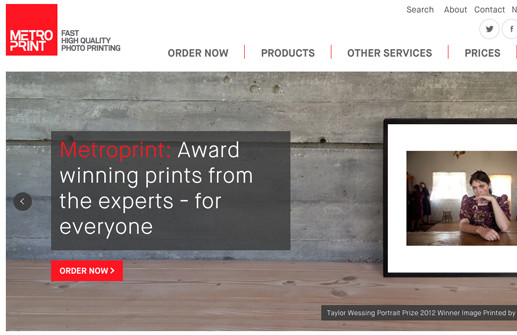
Uploading your file
1. From the Metroprint homepage to begin the print upload and ordering process click the “Order Now” button. 2. You will then be presented with the following screen on which all you need to do is click the “Select Your Images” button (if you find you problems with the uploader beyond this point return here and try the “Non-flash uploader” link below the button). 3. Once you have selected your files and clicked ok you will have the option to add more images or to upload and continue. 4. Whilst the system uploads your images you will be presented with a progress indicator – this may take some time to complete if you are uploading numerous files or large images. It is also dependent on your internet connection speed; so please be patient! 5. Upon the completion of your file upload you will be presented with the main Metroprint ordering […]
Read More
Choosing your size and type of photo print
1. Select your service and paper. ‘Print size as uploaded’ is the default, which picks up the size settings embedded within your file. 2. ‘Custom’ lets you change to a specific size by entering the dimensions in the boxes below. 3. ‘5×7′, ’10×8’, etc lets you choose from our standard set sizes. Please note that all set sizes include borders and the size described includes the 7mm minimum border shown. 4. To change from a set size to ‘Custom’, revert back to ‘Print size as uploaded’ and then choose ‘Custom’. 5. Note that the file will retain it’s aspect ratio – if you change one axis then the other will change inline with it. You may also add borders by selecting the ‘Borders’ tab above. 6. Select the print media for each image under the drop down media menu. 7. From here you can select which paper type you would […]
Read More
Adding borders to your photograph
This tutorial will guide you through adding the correct borders to your prints. You can add borders to your image from the ‘Border’ tab on our image uploader; you can also select a border colour here too, if you so wish. You have two options for adding a border: As a percentage of your existing print size (as denoted by the setting chosen in the ‘Print’ tab). Border will be subtracted from the full print size. As a measurement in millimetres. Border will be added to the existing print size as extra paper (may incur an increased charge if you exceed the paper size for pricing band) The default options for border colours are white or black. If you require a border of a different colour you will need to select Custom and enter a hexadecimal value – a handy reference for hexadecimal colours can be found here. ORDER NOW
Read More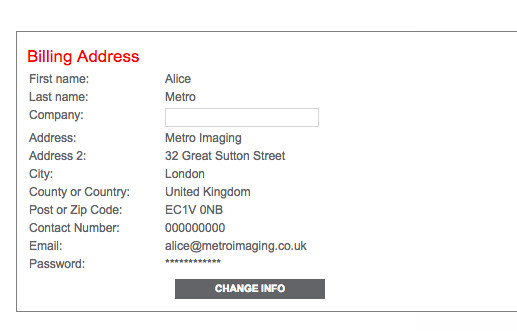
Checking order settings
1. Once you have set up your files you can proceed to the confirmation and registration/login stage. Click the ‘Next Step’ button to proceed. 2. The next screen will display a summary of your order and ask you to enter your email address. If you are a new customer this is to begin your registration, whereas if you are a returning customer this is your login. 3. Click ‘OK’ to continue to the delivery options stage. Below your account details are a variety of options for delivery, and also the option to collect from our Central London Premises, Metro Imaging. 4. Once you have chosen your delivery options click the red ‘Order’ button to proceed to the payment gateway. 5. Please select the credit or debit card option that suits you and complete the payment. YOUR FILES WILL NOT BE UPLOADED TO US FOR PRINTING UNTIL YOUR PAYMENT HAS BEEN […]
Read More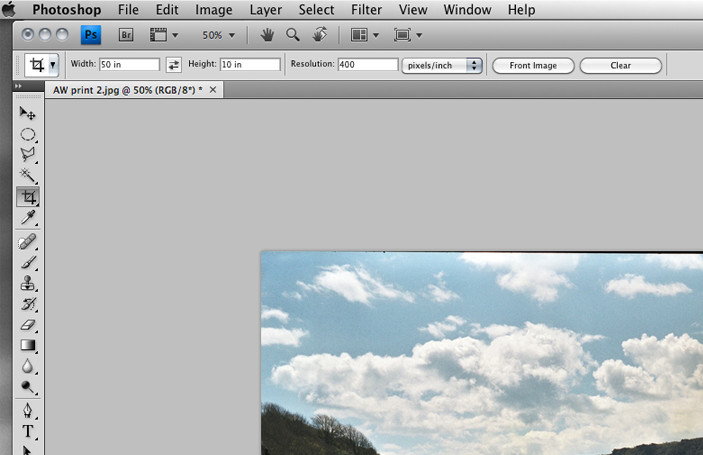
Using Photoshop to make a test strip
Test strips are a useful way of testing your image before you print a full size version. When making a test strip there are a few considerations: If you are testing for a large print (30 x 20 inches and above) then you should produce a test at size – prints tend to ‘open up’ when you print larger showing more detail in darker tones and shadows. You may wish to produce a test that has sections of various images on one print – these should also be done at size. First open the file you want to use for a test strip. The file will need to be at full size so that your strip is an accurate representation of the final print. If you are not sure how to do this, first go to sizing your image file in Photoshop. Select crop tool Input the dimensions and resolution […]
Read More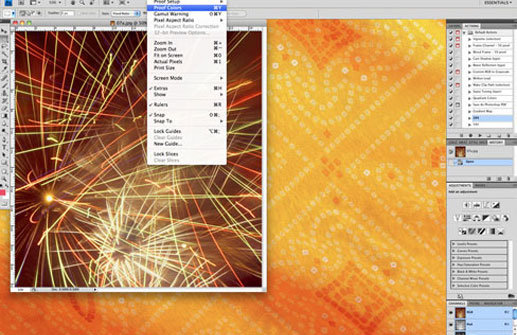
ICC paper profiles for softproofing
Metroprint has the best colour management service that comes with running a long standing professional lab. The best way to test for colour is to print one of your images, around 10×12 inches and compare it to your screen, and in the lighting environment that it will be displayed in. You will find profiles for our photographic papers here. For Giclee and Direct to media printing, we’d prefer these were supplied in Adobe RGB98 Prints under 40 x 30 inches Poli C Type Prints C-Type Matt Poli Matt C-Type Gloss Poli Gloss C-Type Velvet Pure Matt Lambda Fuji Velvet Giclee Fine Art Use Adobe RGB 98 C-Type Metallic Poli Metallic Prints over 40 x 30 inches Lambda C Types / B&W prints Giclee Fine Art Use Adobe RGB 98 C-Type Matt / B&W prints Lambda Matt C-Type Gloss Lambda Gloss C-Type Velvet Pure Matt Lambda Velvet ORDER PRINTS
Read More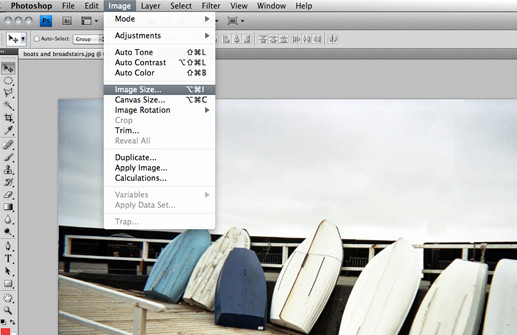
Sizing your image file in Photoshop
Metroprint is a professional online printing service that allows you to upload files already resized to your chosen print dimensions, select a pre-set size, or input your own custom size. You can read more about this here. This tutorial shows you how to use resampling to preserve the data (MB) in your file whilst setting the correct (cm or inches) size for printing. If you would like to understand more about the terms used in describing the process, they are explained at the end. The trick to getting a good quality print is to make sure you don’t unneccessarily lose quality when you change your document size to a print size. A loss of pixels, would mean lower resolution, which is image quality. But here’s the rub: each printer has its own resolution and you cannot exceed or be less than this. So your file should be the correct resolution, at your chosen […]
Read More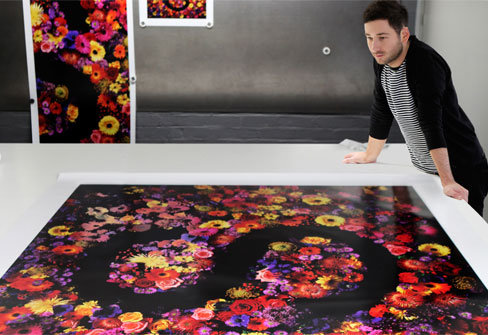
Ordering large format photo prints online
Metroprint offers unique services to photographers such as large format printing on our fantastic supersize Lightjet 500XL printer. Large printing presents some unique considerations in terms of file sizes, uploading and ordering.
Read More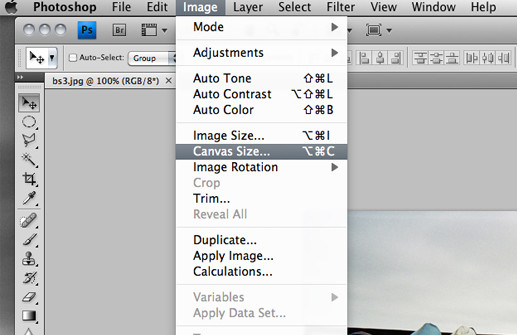
Setting up borders in Photoshop
This tutorial is designed to give you the tools to set up your own borders using simple Photoshop processes. For more information about file sizes and DPI settings, please use our Technical Help calculator. The Metroprint system has a built in border facility, but this is limited in what can be achieved. For total control it is better to set up your own borders within Photoshop. Before starting this tutorial, we would recommend that you read Using Photoshop to Resize and Resample. Go to Image > Canvas Size. Change the dimensions to match the paper size you require. So, if your current image size is 8 x 10 inches and you would like to print this on 11 x 14 inch paper you can change the dimensions to reflect this. Remember, this only applies if the image is less than the required paper size. Your final file will now display with the […]
Read More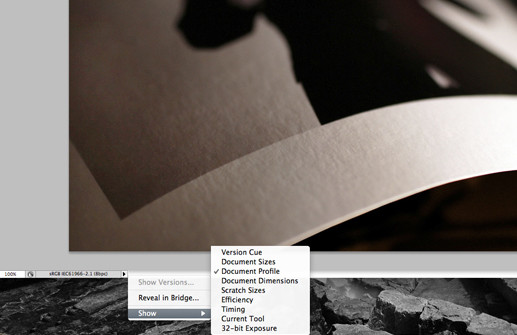
Adobe Colour Space
It is important to make sure all images that you work on have an embedded profile. Photoshop has a colour settings panel that determines how the software will colour manage your files. At Metro we use settings common throughout the photographic industry. This short guide walks you through setting up your Photoshop software so that you are colour managing your files in the same workspace as the lab. Mac Settings: 1. In Photoshop go to Edit > Colour Settings 2. In Settings choose Custom from the drop down menu. 3. In Working Spaces for RGB choose Adobe RGB (1998) for CMYK choose US Web Coated (SWOP) v2. 4. If you would like to check the profile of a file you can always see it at the bottom of the document. ORDER NOW
Read More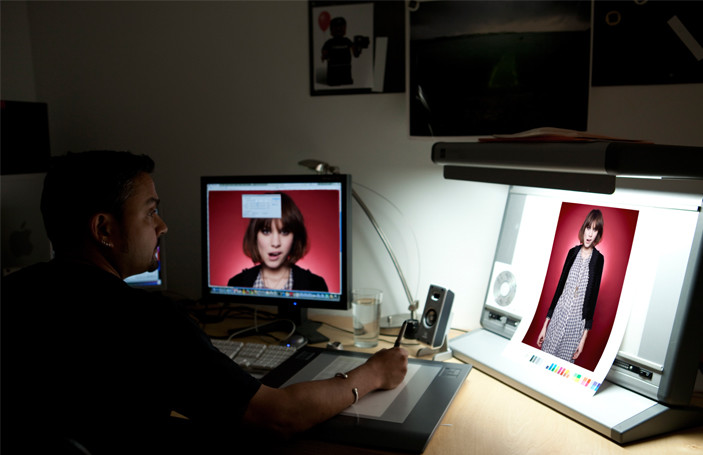
Controlling your (physical) environment
The first step in colour management is to avoid dramatic lighting: keep it ambient in the room where you work. Don’t put your monitor in front of the window or other strong light sources and keep bright objects out of the field of view to avoid reflections on your screen. Choose a nice neutral background patterns for your computer desktop. Ideally use a monitor hood to improve shading of the screen. The best, most accurate way of knowing if your screen is showing accurate colours is to invest in a spectrophotometer device such as an i1Display2 or similar. This inexpensive little gadget comes with full instructions and will perform tests on your screen to determine the output. Visit Gretag Macbeth’s website here To check your screen calibration you can compare a test print side-by-side with its on-screen image using a product such as the Gretag Macbeth / XRITE Colour Checker Chart […]
Read More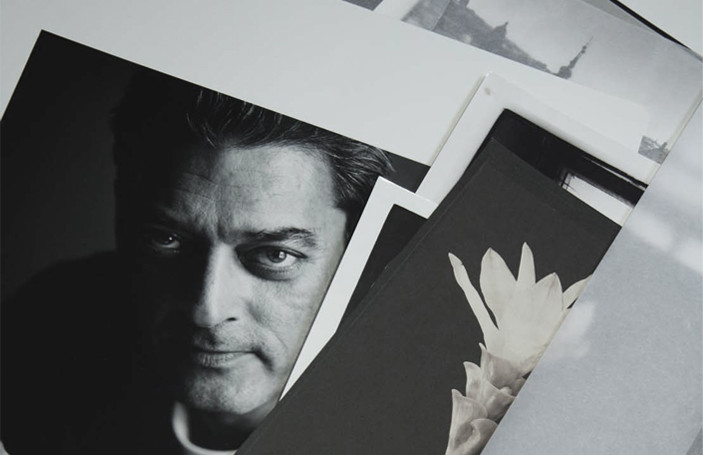
Genuine, professional black and white photo prints
No more colour casts and colour shifts, just genuine black and white photo prints online. Metro Imaging benefit from over thirty five years experience in traditional black and white photo printing to call upon for the quality of our bromide fibre based and resin coated papers. Having helped to develop an innovative paper processor for our Lambda digital printer, we are able to use genuine ILFORD black and white silver gelatin photographic paper. This is as close as you can get to a traditional black and white darkroom photo print from a digital file and we are one of only a handful of companies in the world to offer it. All our genuine black and white Lambda photo prints are produced on archival ILFORD black and white silver gelatin photographic paper. With ‘resin coated’ photo papers, the paper is essentially encapsulated in a plastic envelope and the emulsion stuck on […]
Read More
How to make large format prints
We offer bigger and better prints than any other online service – up to ten feet wide! There’s no getting away from the fact that Metro Imaging have invested in all the best kit. We just can’t help ourselves: Lambdas, large format Lightjets…we just want the best for you because we think you’ll notice the difference. We do. The Océ Lightjet 500XL is probably one of the most amazing printers in the world. At Metro Imaging we have one of only ten in the world so all our C Types over 48 inches wide are printed on this machine. Until we netted ours, you had to go to Dusseldorf to find another one available for photographers. We decided it was time to change all that and now prints measuring ten by six feet are within reach of any photographer in the UK. The paper is so specialised for this machine […]
Read More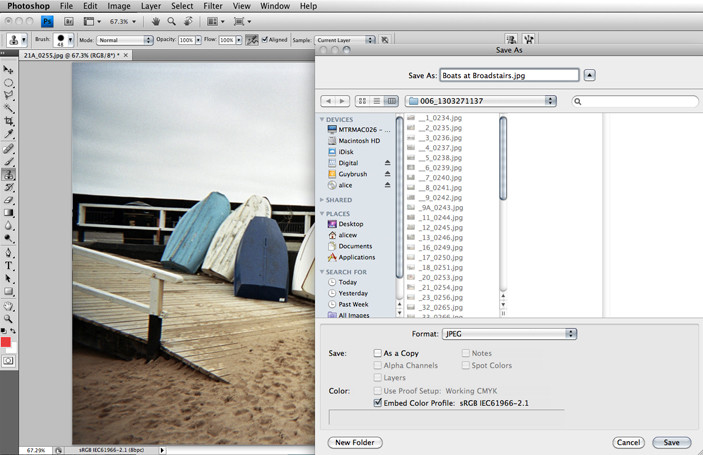
Saving your file for upload
We accept only JPEG or TIFF files at Metroprint. Remember to crop your file, add any borders you would like and save your file at the correct resolution as RGB JPEG or TIFF (all TIFF files must be flattened and 8 bit), for help on how to this, visit our other tutorials on our how to pages. 1. When you are saving your files, please avoid unrecognised characters in filenames, such as asterisks, commas, apostrophes and quotation marks. 2. Please make sure you save the correct file extension on your images (e.g. .jpg). 3. We recommend you save your files as TIFFs to avoid the image being degraded when compressed into a jpeg. Make sure your Tifs have no compression either! (Transfer rates may vary from a few seconds to multiple hours, depending on your file size and your Internet connection.) ORDER NOW
Read More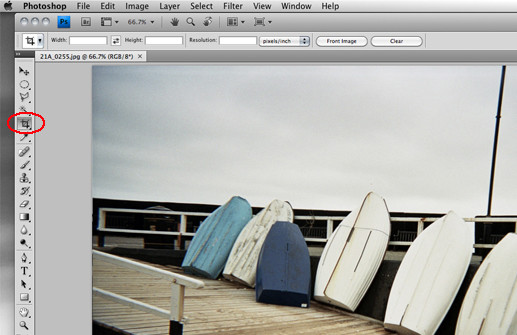
Cropping images using Photoshop
Our quick guide helps you use the tools in Photoshop to crop and save your file for standard paper formats. If you would rather not crop your image to fit, then take a look at our guide on how to add borders. You can use the settings in the crop tool in Photoshop to crop your image to the paper size you require. For example, 10 x 8 inches. You can set the exact size and resolution of your image (see the technical help calculator for the exact resolution of each paper type and size) and use the crop tool to select the area you want to print. Once you are happy with your new image click enter and remember to save the file with a new name using save > save as. ORDER NOW
Read More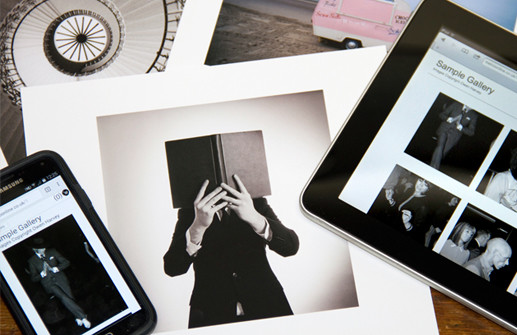
How to Sell Your Photo and Art Prints Online
Sell your photo and art prints online without the hassle… If you want to sell your images online, safe in the knowledge that your work is being produced to the best possible standard, by a professional and renown print lab, then our service is for you. Our hassle free and fully customisable web shop allows your clients to buy your prints straight from you, with no other branding other than your own and no competing with other sellers. Selling photo and art prints online through your website has never been easier It’s simple to set up and allows you to provide your customers with a set of images available for order direct from Metro Imaging. You can set the sizes, prices, paper types and finishes and we will take of the rest; Take a look at an example from Simon Harrison here. How it Works We can guide you through the […]
Read More
How to handle a Giclée print
Handling a Giclée print is a common question we are asked at Metro as fine art prints are susceptible to damage much more than a C Type print. When it comes to Giclée prints we recommend only using this paper when intending to frame straight away. If are are looking for portfolio prints, or free-hanging prints for an exhibition, we will always recommend using C Type papers as these are much more durable. All Metroprint Giclées come rolled over 20 x 16 inches and above Always handle you Giclée print wearing cotton gloves and avoid touching the print itself If you don’t have gloves, make sure you have clean hands and do not touch the ink – even the smallest amount of oil or grease that occurs naturally can damage an inkjet Always hold the print by it’s edges and do not bend the print We recommend printing Giclées with a border, so you have ‘clean’ paper […]
Read MoreIf you are happy to prepare your own files for print, then the Metroprint automated service could be for you. We also have a Deluxe service, so if you want one of our technicians to look over your files for colour adjustments, we can.
With Metroprint you can produce black and white Lambda prints, Giclée Prints and C Types, plus order mounting and framing finishes, at lower online prices than those produced with technicians in lab at Metro Imaging.
Use our handy ‘How To’ guides to get started.
Use our step-by-step guide for perfect prints
Metroprint is a professional quality service that brings together our expertise in colour-management with your expertise in Photoshop. Although it is possible to upload any file, from phone camera, digital camera or scan, we would strongly advise that you follow the following steps to prepare your file from within Photoshop to ensure the best results every time:
- Cropping your image for print
- Sizing your image file in Photoshop
- Adding borders in Photoshop
- Saving your file for print
If you don’t have Adobe Photoshop; or you would prefer to try the in-built tools on the website to do so? This is totally possible. But just incase you get stuck, we have prepared a few tutorials to help you out.
- Uploading your file
- Choosing your print media and size
- Adding borders
- Checking order settings, registering and choosing delivery options
If you get stuck at any point, then please do contact us Monday – Friday, 8.30am – 6.30pm
1. From the Metroprint homepage to begin the print upload and ordering process click the “Order Now” button.
2. You will then be presented with the following screen on which all you need to do is click the “Select Your Images” button (if you find you problems with the uploader beyond this point return here and try the “Non-flash uploader” link below the button).
3. Once you have selected your files and clicked ok you will have the option to add more images or to upload and continue.
4. Whilst the system uploads your images you will be presented with a progress indicator – this may take some time to complete if you are uploading numerous files or large images. It is also dependent on your internet connection speed; so please be patient!
5. Upon the completion of your file upload you will be presented with the main Metroprint ordering screen.
Here you are able to set your service, print size, paper media and border options.
6. Your uploaded file will appear in the main window in the centre.
7. If you uploaded multiple files they will be displayed as small thumbnails below the main window.
To select an alternate file, click on the appropriate thumbnail.
8. This page is where you can set the paper type, the size of the print, border size/colour, and confirm files have been set up correctly (if using Adobe Photoshop).
1. Select your service and paper. ‘Print size as uploaded’ is the default, which picks up the size settings embedded within your file.
2. ‘Custom’ lets you change to a specific size by entering the dimensions in the boxes below.
3. ‘5×7′, ’10×8’, etc lets you choose from our standard set sizes. Please note that all set sizes include borders and the size described includes the 7mm minimum border shown.
4. To change from a set size to ‘Custom’, revert back to ‘Print size as uploaded’ and then choose ‘Custom’.
5. Note that the file will retain it’s aspect ratio – if you change one axis then the other will change inline with it. You may also add borders by selecting the ‘Borders’ tab above.
6. Select the print media for each image under the drop down media menu.
7. From here you can select which paper type you would like to use.
8. Make sure your image DPI matches the print DPI for your paper choice. If you need help finding the correct DPI, use our handy ‘tech help calculator’.
This tutorial will guide you through adding the correct borders to your prints.
You can add borders to your image from the ‘Border’ tab on our image uploader; you can also select a border colour here too, if you so wish.
You have two options for adding a border:
- As a percentage of your existing print size (as denoted by the setting chosen in the ‘Print’ tab). Border will be subtracted from the full print size.
- As a measurement in millimetres. Border will be added to the existing print size as extra paper (may incur an increased charge if you exceed the paper size for pricing band)
The default options for border colours are white or black. If you require a border of a different colour you will need to select Custom and enter a hexadecimal value – a handy reference for hexadecimal colours can be found here.
1. Once you have set up your files you can proceed to the confirmation and registration/login stage. Click the ‘Next Step’ button to proceed.
2. The next screen will display a summary of your order and ask you to enter your email address. If you are a new customer this is to begin your registration, whereas if you are a returning customer this is your login.
3. Click ‘OK’ to continue to the delivery options stage. Below your account details are a variety of options for delivery, and also the option to collect from our Central London Premises, Metro Imaging.
4. Once you have chosen your delivery options click the red ‘Order’ button to proceed to the payment gateway.
5. Please select the credit or debit card option that suits you and complete the payment.
YOUR FILES WILL NOT BE UPLOADED TO US FOR PRINTING UNTIL YOUR PAYMENT HAS BEEN RECEIVED.
Test strips are a useful way of testing your image before you print a full size version.
When making a test strip there are a few considerations:
- If you are testing for a large print (30 x 20 inches and above) then you should produce a test at size – prints tend to ‘open up’ when you print larger showing more detail in darker tones and shadows.
- You may wish to produce a test that has sections of various images on one print – these should also be done at size.
- First open the file you want to use for a test strip. The file will need to be at full size so that your strip is an accurate representation of the final print. If you are not sure how to do this, first go to sizing your image file in Photoshop.
- Select crop tool

- Input the dimensions and resolution for the crop required (please see our price list for test strip sizes). Our resolutions are:
Up to 30 x 20 inches Larger than 30 x 20 inches C types 200 dpi 200 dpi Giclee 300 dpi Inkjet 300 dpi - Drag the crop tool on the image to define area of test strip. Ideally you want to be selecting a crop that will include the broadest tonal range of your image (essentially both the brightest and darkest tones) and any important colours or details.
- Execute crop by clicking the green tick on your toolbar
- Save as and upload to Metroprint
If you would like to see more information on how to prepare your files for print, then you might find this tutorial helpful: How To Make A Print
Metroprint has the best colour management service that comes with running a long standing professional lab. The best way to test for colour is to print one of your images, around 10×12 inches and compare it to your screen, and in the lighting environment that it will be displayed in.
You will find profiles for our photographic papers here. For Giclee and Direct to media printing, we’d prefer these were supplied in Adobe RGB98
| Prints under 40 x 30 inches | Poli C Type Prints |
| C-Type Matt | Poli Matt |
| C-Type Gloss | Poli Gloss |
| C-Type Velvet Pure Matt | Lambda Fuji Velvet |
| Giclee Fine Art | Use Adobe RGB 98 |
| C-Type Metallic | Poli Metallic |
| Prints over 40 x 30 inches | Lambda C Types / B&W prints |
| Giclee Fine Art | Use Adobe RGB 98 |
| C-Type Matt / B&W prints | Lambda Matt |
| C-Type Gloss | Lambda Gloss |
| C-Type Velvet Pure Matt | Lambda Velvet |
Metroprint is a professional online printing service that allows you to upload files already resized to your chosen print dimensions, select a pre-set size, or input your own custom size. You can read more about this here.
This tutorial shows you how to use resampling to preserve the data (MB) in your file whilst setting the correct (cm or inches) size for printing. If you would like to understand more about the terms used in describing the process, they are explained at the end.
The trick to getting a good quality print is to make sure you don’t unneccessarily lose quality when you change your document size to a print size. A loss of pixels, would mean lower resolution, which is image quality. But here’s the rub: each printer has its own resolution and you cannot exceed or be less than this. So your file should be the correct resolution, at your chosen width and height. The correct resolution also comes in to play with getting the borders you want so it’s useful to learn as much as possible about how to keep your files in line with the printer settings.
1. So firstly, to find out the right resolution for your print type (size, paper,type) always use the technical help calculator.
2. The calculator will tell you the right resolution (dpi) for your chosen print type (e.g C Type, Giclée, black and white) and size (different printers are set up for specific sizes, for example the Lambda is 200dpi, the Lightjet 300dpi). Now you know the correct resolution, you can set your document size to your chosen width and height.
3. Go to Image> Image size
4. Make sure that Constrain Proportions is checked.
5. Uncheck Resample Image. The ticks to the right shows that width, height and resolution are now linked.
6. Keep an eye on the Pixel Dimensions (16.3M in this example) you will notice that now they remain constant when you adjust the width and height. If you add extra (cm) size, the resolution (pixel/inch) will go down, if you remove (cm) size, your resolution will go up.
7. In this illustration I have taken the size down to 6 inches and the resolution has gone up to 418 ppi. This is over the correct resolution for a Giclée print which is 300dpi.
8. So set your (cm or inches) document size, and observe the resolution. If the resolution is over or under the correct resolution go to stage 5. NB: When using this method you should set the resolution first and the image size second. Check the Resample Image. Now the link symbol will return to just width and height.
9. Change the resolution for your print type to the correct resolution given by the technical help calculator.
10. In this example, I have changed the resolution to 300dpi. You will notice that the pixel dimensions have gone down from 16.3Mb to 8.38Mb. This is because my file was too big for my desired print size. Photoshop is using resampling (in this case, resampling down) to take away unnecessary pixels. This will make upload time quicker and my file easier for the printer to handle.
11. If your resolution is lower than the correct resolution for your print type, you have two choices: either add in pixels at this stage by using resampling (up) or make a smaller print and keep within the limitations of your file.
12. Having set up your preferred width and height at the correct resolution for your media type, you can now set up custom borders in Photoshop.
Metroprint offers unique services to photographers such as large format printing on our fantastic supersize Lightjet 500XL printer. Large printing presents some unique considerations in terms of file sizes, uploading and ordering.
This tutorial is designed to give you the tools to set up your own borders using simple Photoshop processes. For more information about file sizes and DPI settings, please use our Technical Help calculator.
The Metroprint system has a built in border facility, but this is limited in what can be achieved. For total control it is better to set up your own borders within Photoshop.
Before starting this tutorial, we would recommend that you read Using Photoshop to Resize and Resample.
- Go to Image > Canvas Size.
- Change the dimensions to match the paper size you require. So, if your current image size is 8 x 10 inches and you would like to print this on 11 x 14 inch paper you can change the dimensions to reflect this. Remember, this only applies if the image is less than the required paper size.
- Your final file will now display with the border.
Metroprint recommends a minimum of 1/4 inch borders on all paper types. Smaller than this we can’t guarantee we can trim exactly to your specification.
It is important to make sure all images that you work on have an embedded profile. Photoshop has a colour settings panel that determines how the software will colour manage your files. At Metro we use settings common throughout the photographic industry.
This short guide walks you through setting up your Photoshop software so that you are colour managing your files in the same workspace as the lab.
Mac Settings:
1. In Photoshop go to Edit > Colour Settings
2. In Settings choose Custom from the drop down menu.
3. In Working Spaces for RGB choose Adobe RGB (1998) for CMYK choose US Web Coated (SWOP) v2.
4. If you would like to check the profile of a file you can always see it at the bottom of the document.
The first step in colour management is to avoid dramatic lighting: keep it ambient in the room where you work. Don’t put your monitor in front of the window or other strong light sources and keep bright objects out of the field of view to avoid reflections on your screen.
Choose a nice neutral background patterns for your computer desktop. Ideally use a monitor hood to improve shading of the screen. The best, most accurate way of knowing if your screen is showing accurate colours is to invest in a spectrophotometer device such as an i1Display2 or similar. This inexpensive little gadget comes with full instructions and will perform tests on your screen to determine the output.
Visit Gretag Macbeth’s website here
To check your screen calibration you can compare a test print side-by-side with its on-screen image using a product such as the Gretag Macbeth / XRITE Colour Checker Chart for a final check of saturation, density and hue.
Read more about the Colour Checker here
Remember you can also soft-proof your prints at Metroprint. This is a good way of checking your colour is correct before going to print.
No more colour casts and colour shifts, just genuine black and white photo prints online.
Metro Imaging benefit from over thirty five years experience in traditional black and white photo printing to call upon for the quality of our bromide fibre based and resin coated papers. Having helped to develop an innovative paper processor for our Lambda digital printer, we are able to use genuine ILFORD black and white silver gelatin photographic paper.
This is as close as you can get to a traditional black and white darkroom photo print from a digital file and we are one of only a handful of companies in the world to offer it. All our genuine black and white Lambda photo prints are produced on archival ILFORD black and white silver gelatin photographic paper. With ‘resin coated’ photo papers, the paper is essentially encapsulated in a plastic envelope and the emulsion stuck on the outside of the resin. Being true silver gelatin emulsion, the photo prints have a consistent and neutral image tone (in other words – no colour cast) and the paper offers fine tonal benefits including strong blacks and subtle highlight detail. We also now offer fibre based photo prints through Metroprint.
Read more about fibre based paper here. If you’d like to read more about ‘genuine’ black and white photo prints, please visit “What is a ‘genuine’ black and white print?’.
We offer bigger and better prints than any other online service – up to ten feet wide!
There’s no getting away from the fact that Metro Imaging have invested in all the best kit. We just can’t help ourselves: Lambdas, large format Lightjets…we just want the best for you because we think you’ll notice the difference. We do.
The Océ Lightjet 500XL is probably one of the most amazing printers in the world. At Metro Imaging we have one of only ten in the world so all our C Types over 48 inches wide are printed on this machine. Until we netted ours, you had to go to Dusseldorf to find another one available for photographers. We decided it was time to change all that and now prints measuring ten by six feet are within reach of any photographer in the UK. The paper is so specialised for this machine it is made in one factory in New Mexico: a large format coating plant for the biggest photographic paper in the world. (As you can probably imagine, this printer needs special treatment, so our large format digital C Types are processed slightly differently to other colour photographic prints). See here for more details.
And it’s not just photographic printing that’s got bigger: in the Metro Giclée studio we have an array of top-of the range inkjet printers. The most popular of these is the Epson 11880 a pro quality digital printer capable of printing up to 64 inches wide and the Epson 9900 a fast and capable printer for up to 44 inches using papers of up to 1.5mm thick. These printers are ideal for fine art photography and proofing. Read more about our history of developing innovative printing methods here.
We accept only JPEG or TIFF files at Metroprint.
Remember to crop your file, add any borders you would like and save your file at the correct resolution as RGB JPEG or TIFF (all TIFF files must be flattened and 8 bit), for help on how to this, visit our other tutorials on our how to pages.
1. When you are saving your files, please avoid unrecognised characters in filenames, such as asterisks, commas, apostrophes and quotation marks.
2. Please make sure you save the correct file extension on your images (e.g. .jpg).
3. We recommend you save your files as TIFFs to avoid the image being degraded when compressed into a jpeg. Make sure your Tifs have no compression either!
(Transfer rates may vary from a few seconds to multiple hours, depending on your file size and your Internet connection.)
Our quick guide helps you use the tools in Photoshop to crop and save your file for standard paper formats.
If you would rather not crop your image to fit, then take a look at our guide on how to add borders.
You can use the settings in the crop tool in Photoshop to crop your image to the paper size you require. For example, 10 x 8 inches.
You can set the exact size and resolution of your image (see the technical help calculator for the exact resolution of each paper type and size) and use the crop tool to select the area you want to print.
Once you are happy with your new image click enter and remember to save the file with a new name using save > save as.
Sell your photo and art prints online without the hassle…
If you want to sell your images online, safe in the knowledge that your work is being produced to the best possible standard, by a professional and renown print lab, then our service is for you.
Our hassle free and fully customisable web shop allows your clients to buy your prints straight from you, with no other branding other than your own and no competing with other sellers.
Selling photo and art prints online through your website has never been easier
It’s simple to set up and allows you to provide your customers with a set of images available for order direct from Metro Imaging. You can set the sizes, prices, paper types and finishes and we will take of the rest; Take a look at an example from Simon Harrison here.
How it Works
We can guide you through the installation process on your website, match the font and colour themes you use and show you how to add images and set prices.
Behind the scenes, we will take payment for you, your high-resolution file is retrieved from our server; your print is produced, checked, packed, labelled and posted without you lifting a finger! and of course offer after sales care for your clients.
For more details please email us or give us a call on 0207 865 0000
Handling a Giclée print is a common question we are asked at Metro as fine art prints are susceptible to damage much more than a C Type print. When it comes to Giclée prints we recommend only using this paper when intending to frame straight away. If are are looking for portfolio prints, or free-hanging prints for an exhibition, we will always recommend using C Type papers as these are much more durable.
- All Metroprint Giclées come rolled over 20 x 16 inches and above
- Always handle you Giclée print wearing cotton gloves and avoid touching the print itself
- If you don’t have gloves, make sure you have clean hands and do not touch the ink – even the smallest amount of oil or grease that occurs naturally can damage an inkjet
- Always hold the print by it’s edges and do not bend the print
- We recommend printing Giclées with a border, so you have ‘clean’ paper to handle, this is useful for larger prints that come rolled.
- All Giclées naturally ‘curl’. To uncurl a print: Place the print on a flat, clean surface away from direct sunlight and leave the protective tissue over the print. Place a book, or another heavy object on the very ends of the print. After a few hours the print should become flat.

Sign up for our newsletter
Sign up to our Newsletter for the latest on exhibitions, events, photo competitions, discounts and promotions!